Sync WooCommerce to Xero
Add and edit a sync connection
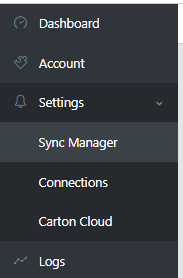
- Fromt the menu, select Settings > Sync Manager
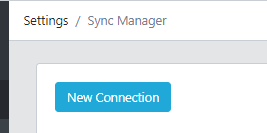
- Select your connection from the list. If you have mutliple types available to you, you are able to filter
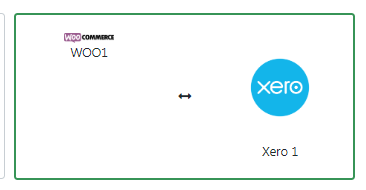

- This will bring you to the configuration screen
Settings for Orders
- If you want to sync orders from WooCommerce to Rekcon, tick the box below. Click the link to expand the options

- The following options dictate how the orders flow from WooCommerce to Xero
- Sync order from WooCommerce with status - Select the order statuses that will be brought into Xero. At least one is required.

- If sending payments to Xero, the invoice type must be Authorised, otherwise it can be Draft or Submitted
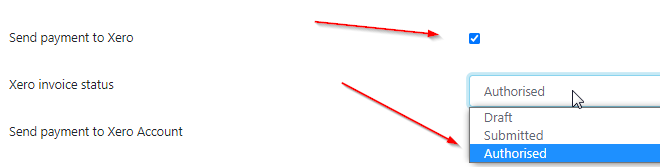
- If sending payments, select the bank account to send to

- Send orders with customer type - you can have the system use a generic customer for online orders or create a new customer
- The system will match on Fullname (First Name and Last Name) and Email address
- New customers are created using the details from WooCommerce
- If you want to use a generic customer, select them in the "Existing customer code" field

- Send to Reckon as type order - this is the order type that will be sent to Xero. Currently only Invoice is allowed
- Use WooCommerce invoice as Xero invoice - this will send the order to Xero using the WooCom order number. Leave this unticked to use the Xero invoice numbers
- If using WooCommerce order number, use a prefix - this will prepend to the order number if using WooCom's order number

- Xero line types determines how the sales lines will be sent through. If using inventory in Xero select Inventory Items, otherwise you can send directly to a sales account

- If using a sales account for sales lines, select the Sales accoutn from the dropdown

- Match stock on - this is how Wbsync will match items sold in WooCommerce to Xero. The Xero item Name needs to match this field.
- Select a default item incase there is a missing item that is WooCommerce but not Xero

- Select the freight line type and the relevant Sales Account code or Inventory item

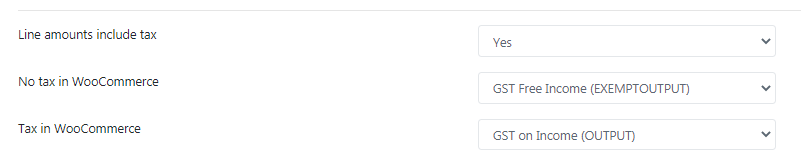
- Select if the line types in WooCommerce include tax or not. From the dropdowns select the Xero tax codes to use when a WooCommerce lines does or doesnt have tax